In part 1 I promised to show you how to link to the web. What if you have to grab that data every month? What if every day? Are you OK copying and pasting? I assume the answer is no. As computers and applications get progressively more complex, we humans have to pass the repetitive work to them. I am not going into how you should spend your freed up time.
Option 1: Power Query
Let’s say, every morning you have to get exchange rates from Bank of Canada. Although that site offers to download a .CSV file with same data, others might not provide you that option. Still, downloading a .CSV means you have to do a lot of clicking, saving as, opening, manipulating. I’ll show you a much faster option.
Step 1: Locate the website and the table
Following the link above will bring you to a webpage that contains a table with data we need.
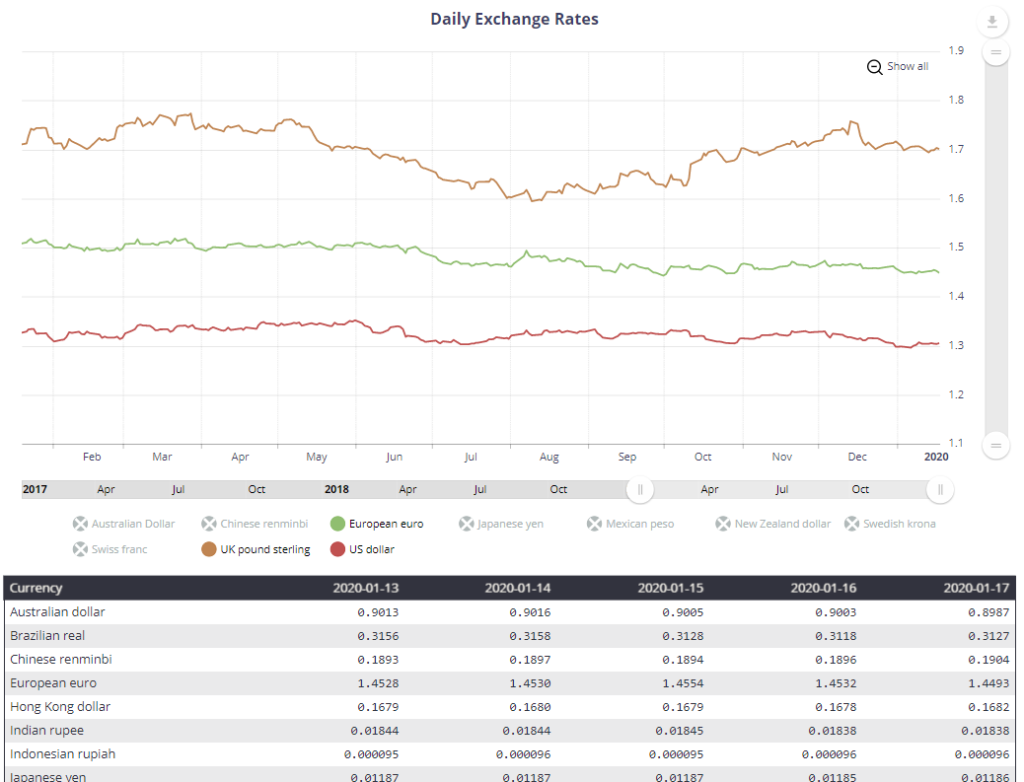
Notice there is a table below the graph. This table will appear on your Excel grid.
Step 2: Copy the URL
Click on the address bar. The URL will be highlighted. Copy the URL by using Ctrl+C to have it ready to paste to Excel.

Step 3: Access the URL through Excel
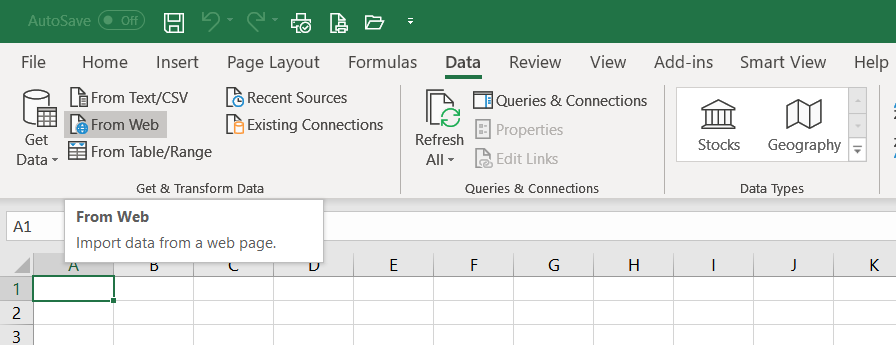
Steps for Excel 2016 or later, or Office 365 with most up to date version of Excel. Go to Data tab in the ribbon, Get & Transform Data group of buttons, select the From Web button. If you have earlier versions, you can download and install a free Excel add-in Power Query. There are a number of articles on the web how to do that.
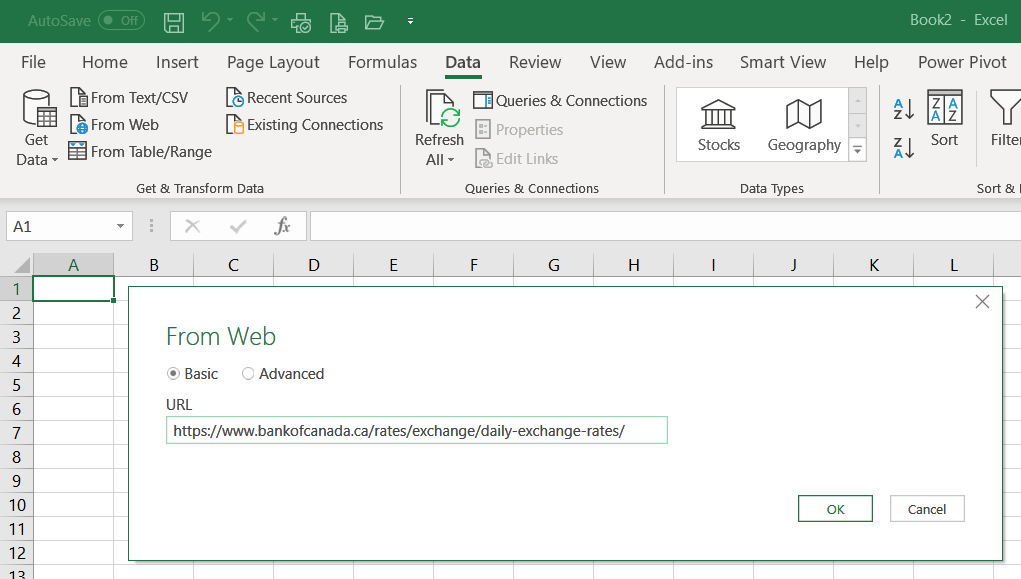
When you click on From Web button, a new window will open. Just paste the URL from step 2 into the field URL. Then click OK.
Step 4: Security/Permissions
Next window will give you a bunch of options to authorize your access to the website. Here I am covering only the first option Anonymous. As you don’t need any authorization to visit Bank of Canada, or Wikipedia, or many other web resources. Other options will allow you to login using a user name and a password to web sites that require authentication.
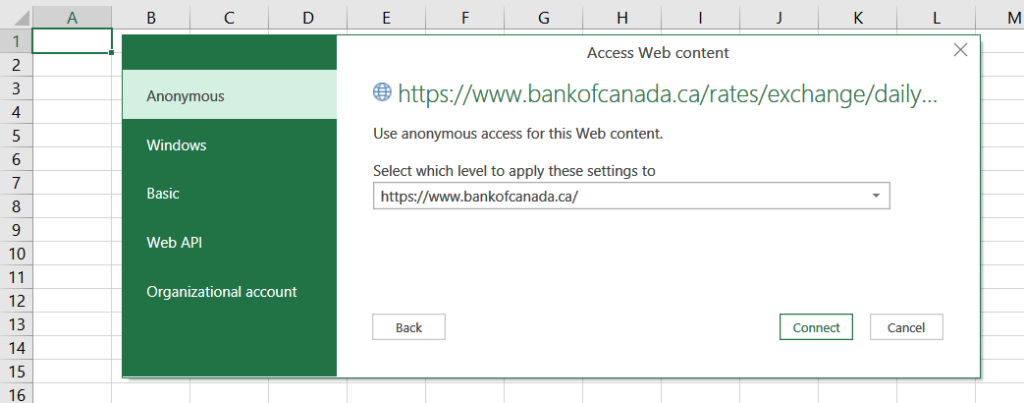
Clicking on Connect will make Excel remember the domain and your choice. When you try to build another query from same domain, this window will be skipped. Click on Connect; you will be taken to the next window.
Step 5: Select the table
There might be many tables on your web page of choice. Navigator window with the preview helps to select the right one. In our case the second one “Table 0” is the one we want. As we select it in the list on the left, we can see a preview of what’s in that table. You can compare with the screenshot from step 1 and see that Australian dollar on January 13, 2020 was 0.9013 Canadian dollars.
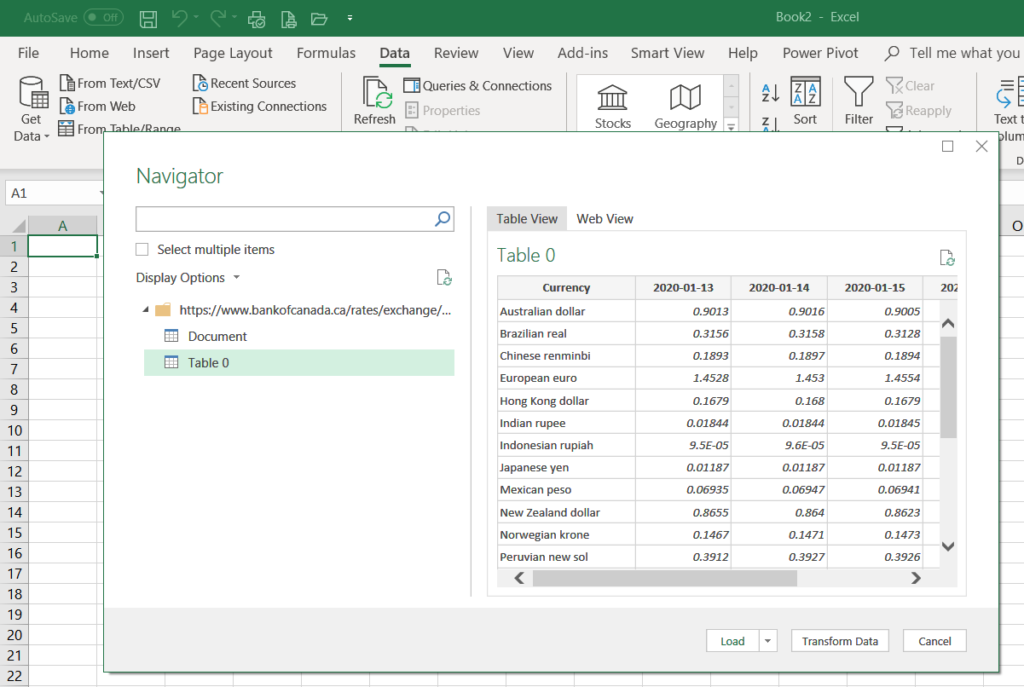
If the list of tables on the left is long and you know the table name, you can search for it by typing in the search field. Also, enabling Select Multiple Items will allow you to pick many tables and therefore create a query for each. My advice is to go one by one
As you select the correct table, hit Load button to make it happen.
The button Transform Data will open Query Editor that will allow you to apply a number of transformations to the data limited only by your imagination. Stay tuned for more articles on this website covering Query Editor and M language.
Step 5: Enjoy!
Notice how Excel adds a new table and a new worksheet. Also, notice the name of the query (in the Queries & Connections pane on the right) is the name of the table selected in the previous step.
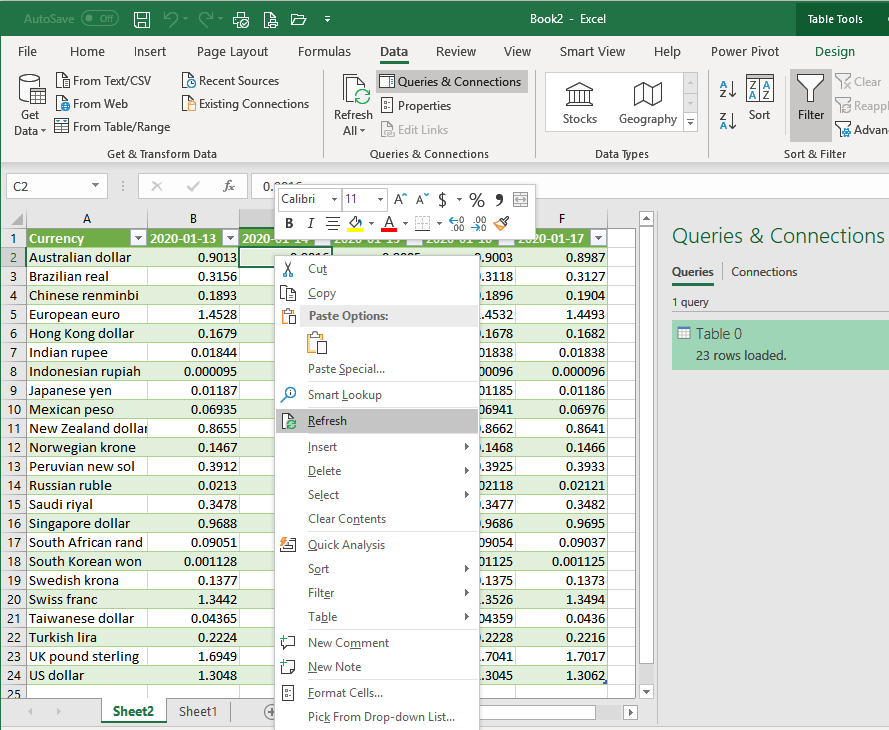
This is a live refreshable table, connected to the webpage of choice. You have four possible ways to refresh it: (i) right-click anywhere on the table -> Refresh as in the screenshot, (ii) right-click on the query (in the pane on the right) -> Refresh in the context menu, (iii) click on the small Refresh icon located in the top-right corner of the query, and (iv) the most obvious, in the Data tab in the ribbon, Queries & Connections group of buttons, click the Refresh All button.
As promised, it will take you less clicks every morning. Refreshing takes a few seconds of your valuable time.
Option 2: Export to Microsoft Excel
In Internet Explorer right-click on a table (must right-click on one of the rows, not on the header) with data you need, to open context menu, then click Export to Microsoft Excel as shown in the screenshot below.
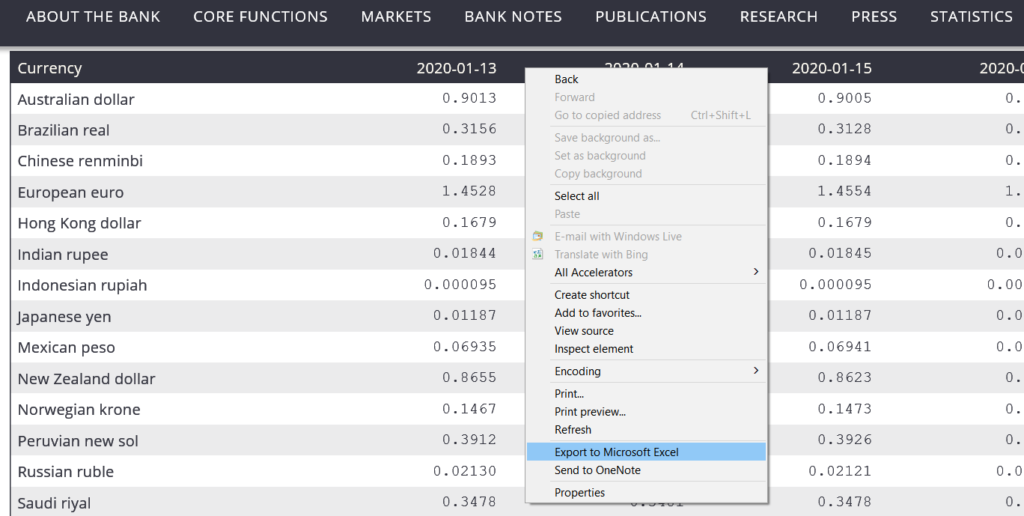
It will open a new Excel workbook with this table imported.
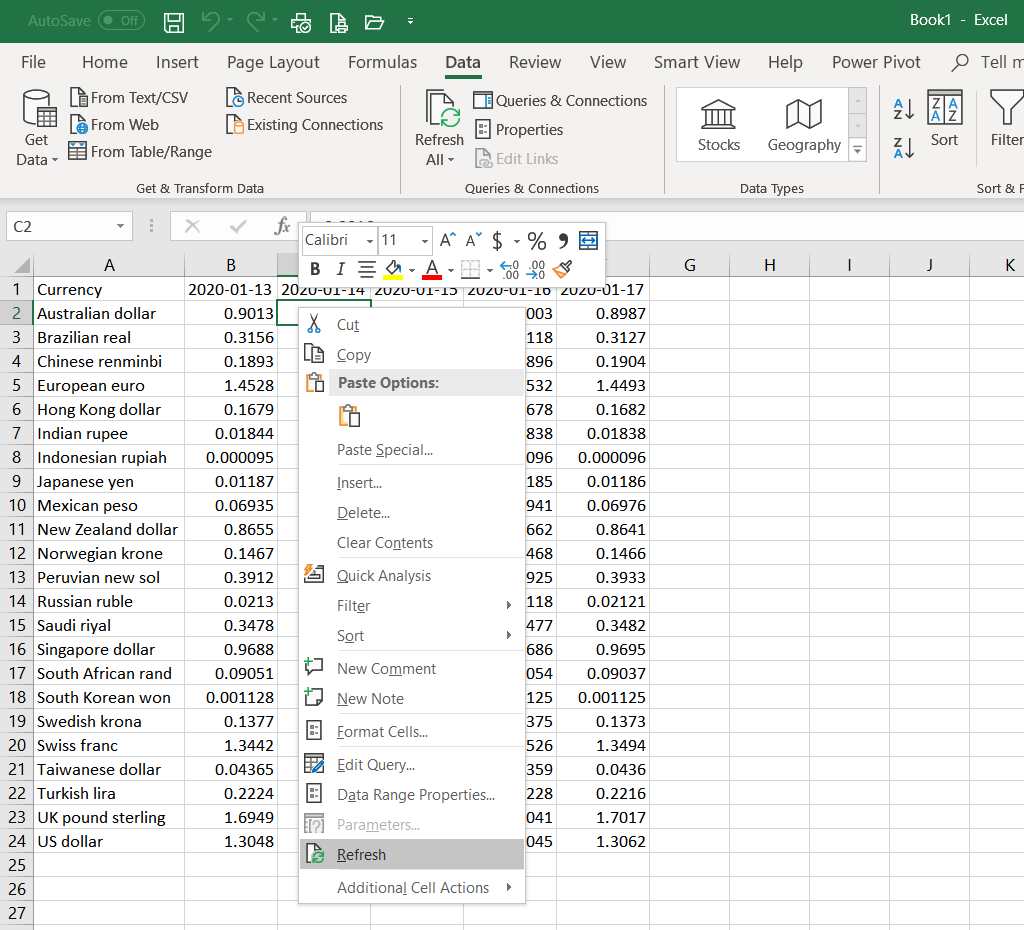
This table, although not formatted, is linked to the webpage and is refreshable. Right-click anywhere on the table to find Refresh or click on Refresh All button in the Data tab of the ribbon.
A huge limitation to this method is, it works only in Internet Explorer. No, it doesn’t work in Microsoft Edge. Naturally, in other (non-Microsoft) browsers it will not work either. Another limitation, from my perspective, is that it doesn’t create a Power Query and therefore it will be impossible to use Query Editor and M language to transform data.


